Google Sheets Uploader Add-On
To make it easy to get started with Pipeless, we have a Google Sheets Add-On event uploader. This add-on lets you quickly upload structured event data without having to write any code.
Installing the Add-On
You can install the add-on by going directly to our add-on listing here: Google Sheets Add-On from the Google Workspace Marketplace, or you can enable the add-on from Google Sheets by clicking on the "Add-ons" top navigation and clicking "Get add-ons" and searching for and installing the "Pipeless" add-on.

Get the add-on from Google Sheets
Starting the Add-On
Once the add-on has been connected to your Google account, you should see it in the "Add-ons" dropdown list (it can take a second or two to load the list). Click on "Open Uploader Sidebar" to bring the controls into view.

Open uploader sidebar
Using the Add-On
Introduction to the Uploader Sidebar
The Pipeless Uploader Sidebar should look like the screenshot below. At the top, it describes how the uploader works, where each row will be read as an event and then all of your event rows will be uploaded in batches to 10 events per call, which will help minimize the costs of your call plan. This uploader also has built-in rate limiting, so that's taken care of for you.
In the future, if you are looking for this documentation again, clicking "Sheets Uploader Guide" will direct you to this page you are reading now.
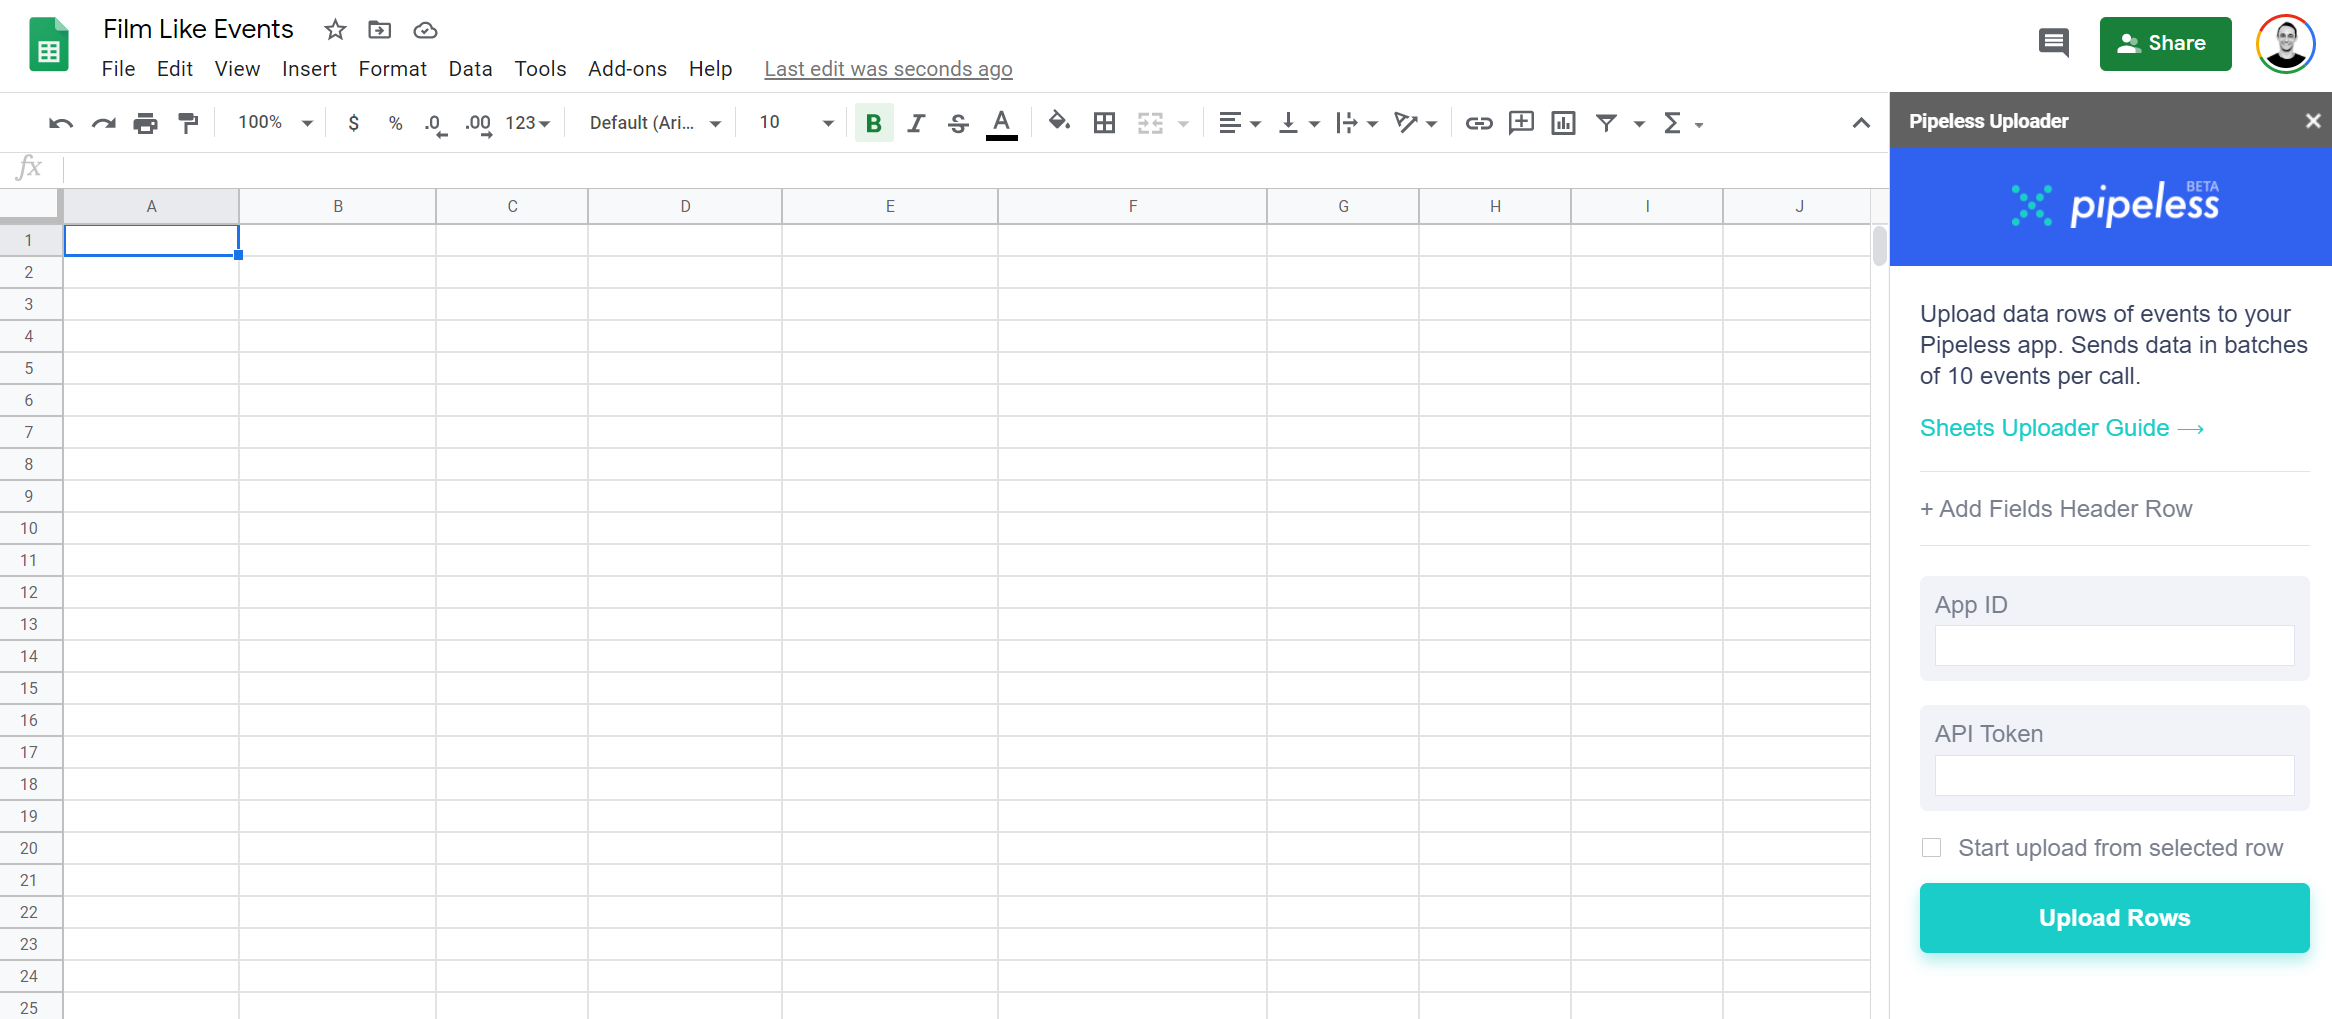
Uploader sidebar
Field Headers Row
To get a templated structure to work from, clicking "Add Fields Header Row" will add the basic fields used when creating events in the Pipeless system. Each of these data fields must be formatted in accordance with the Create Events Batch reference docs.
The field "relationship_created_on" is the only optional field. If you leave that field blank, Pipeless will assign the current time from when it is received.
The uploader does expect this header row to be there, so by default uploads start from Row 2.

Click "Add Fields Header Row" to add a top row template structure
Here is an example of a populated sheet with event rows ready for upload.
Reminder that "start_object_type" and "end_object_type" must be from our set list of object types, and do not take custom type names. The field "relationship_type" is similar, where you are limited to our set list of relationship types. You can find an up-to-date list of those types here in the Create Events Batch reference docs.
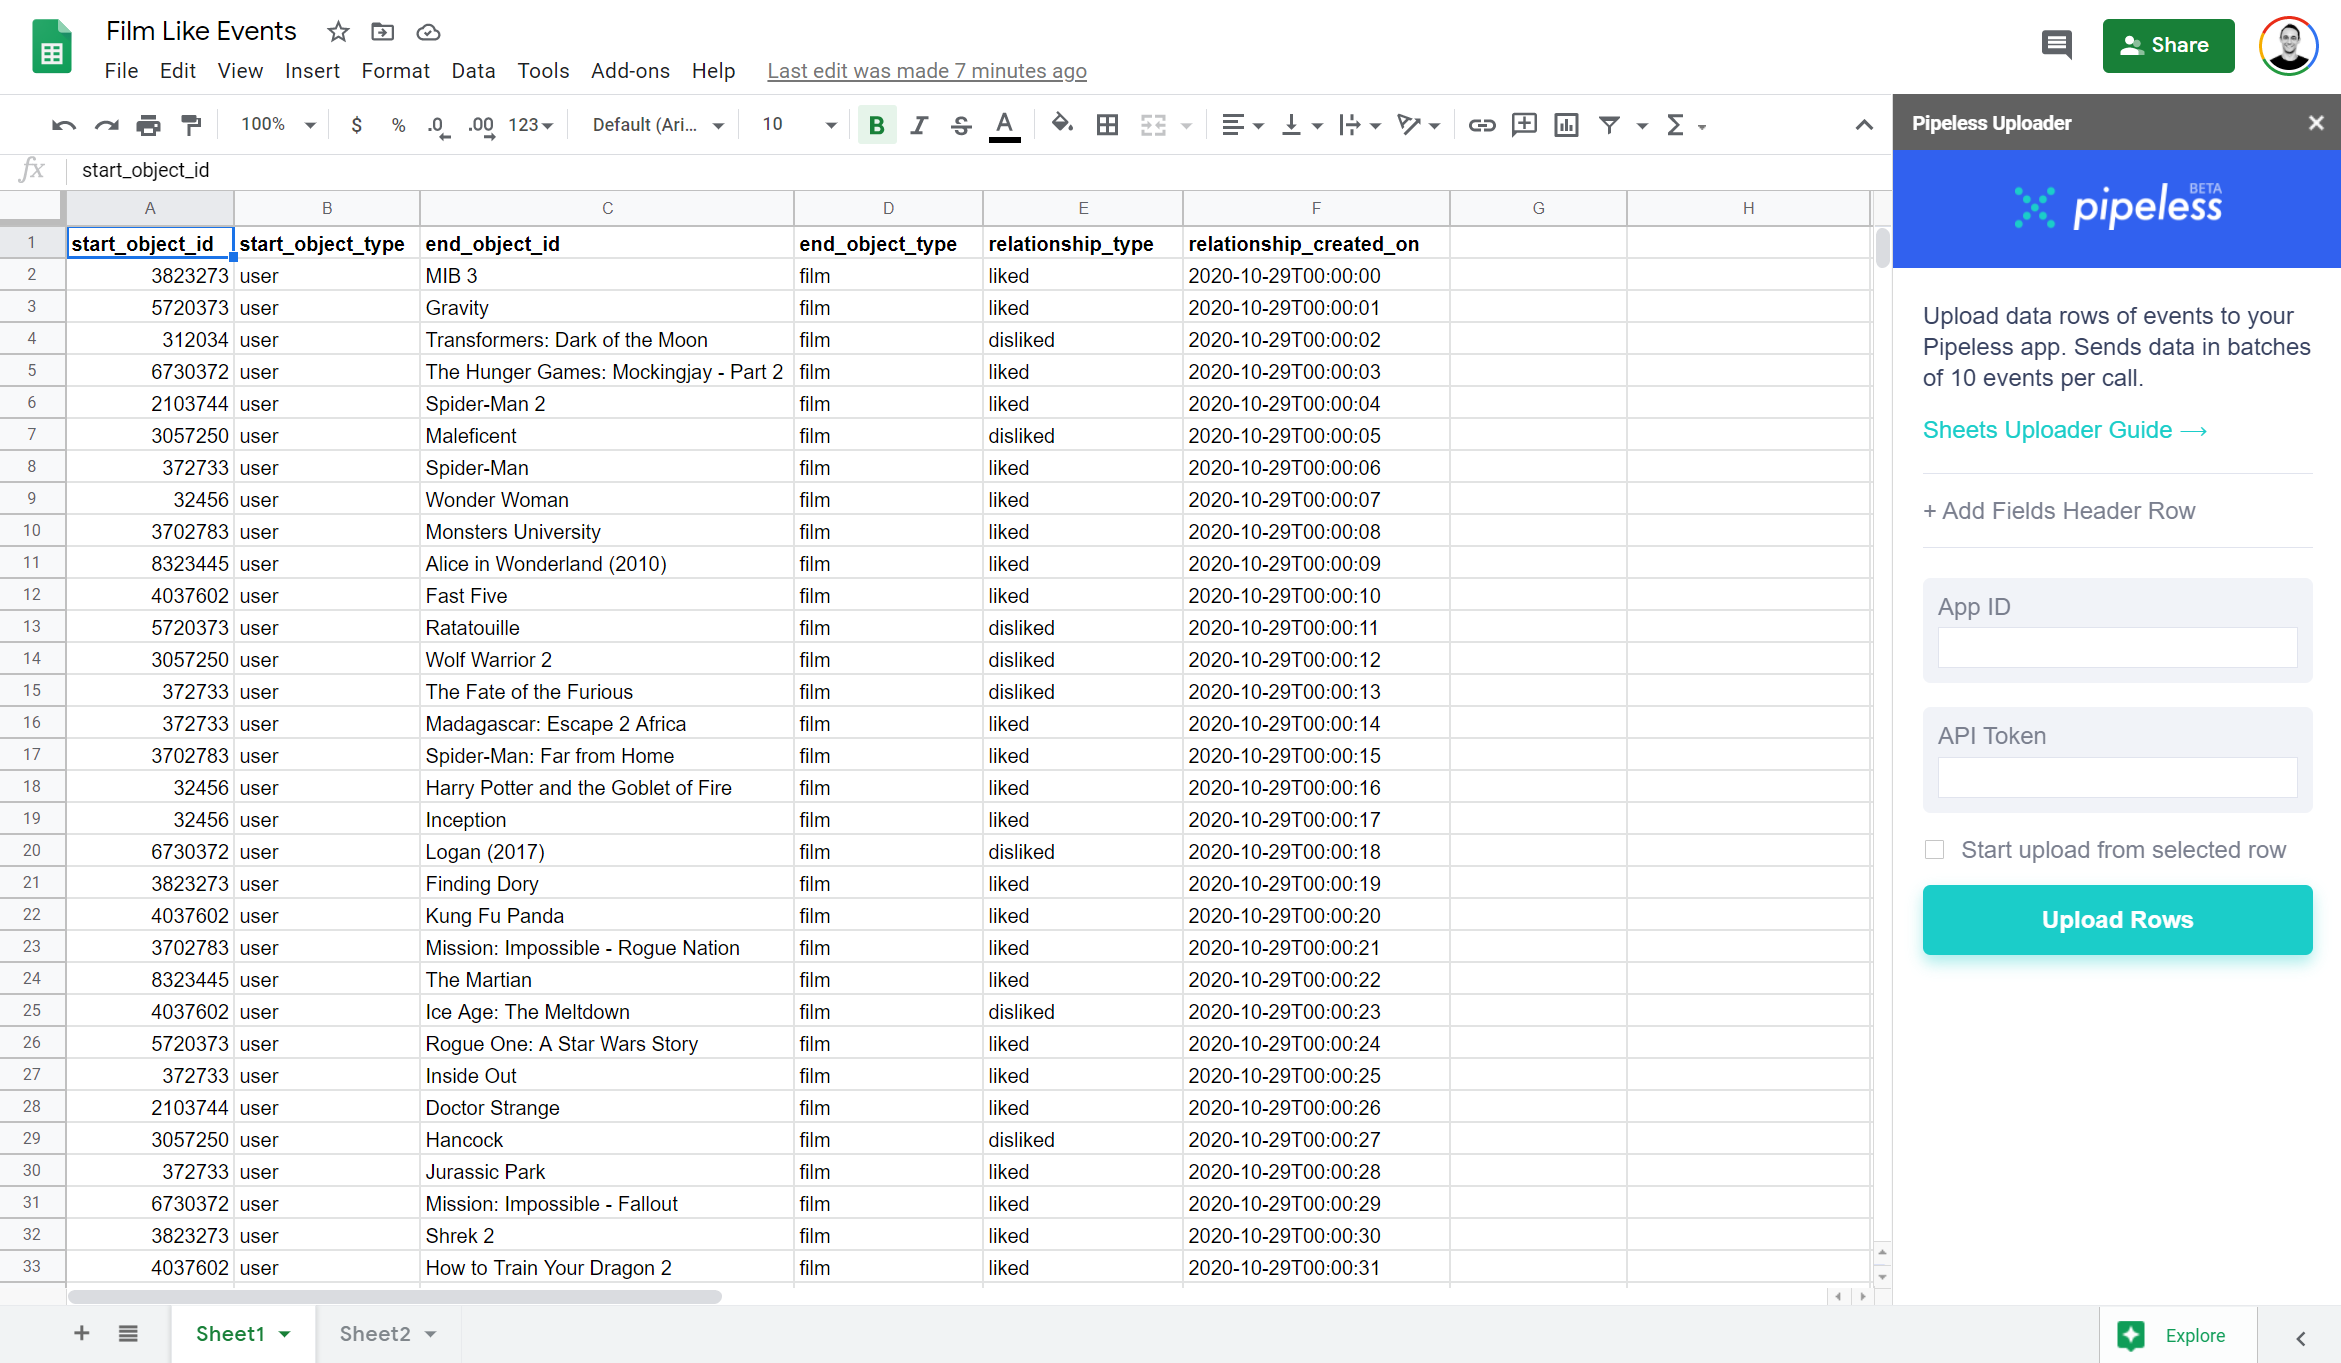
Populated sheet
Uploading event data
To start an upload, you'll need to enter your App ID and API Token which you can find in the Pipeless after you have created your App. Please enter your own unique App ID and API Token and not the examples used here.
Once you click the button "Upload Rows" the upload process will start from Row 2 (it skips the header fields row) and will show progress for each batch of 10 events that are sent to the Pipeless servers successfully.
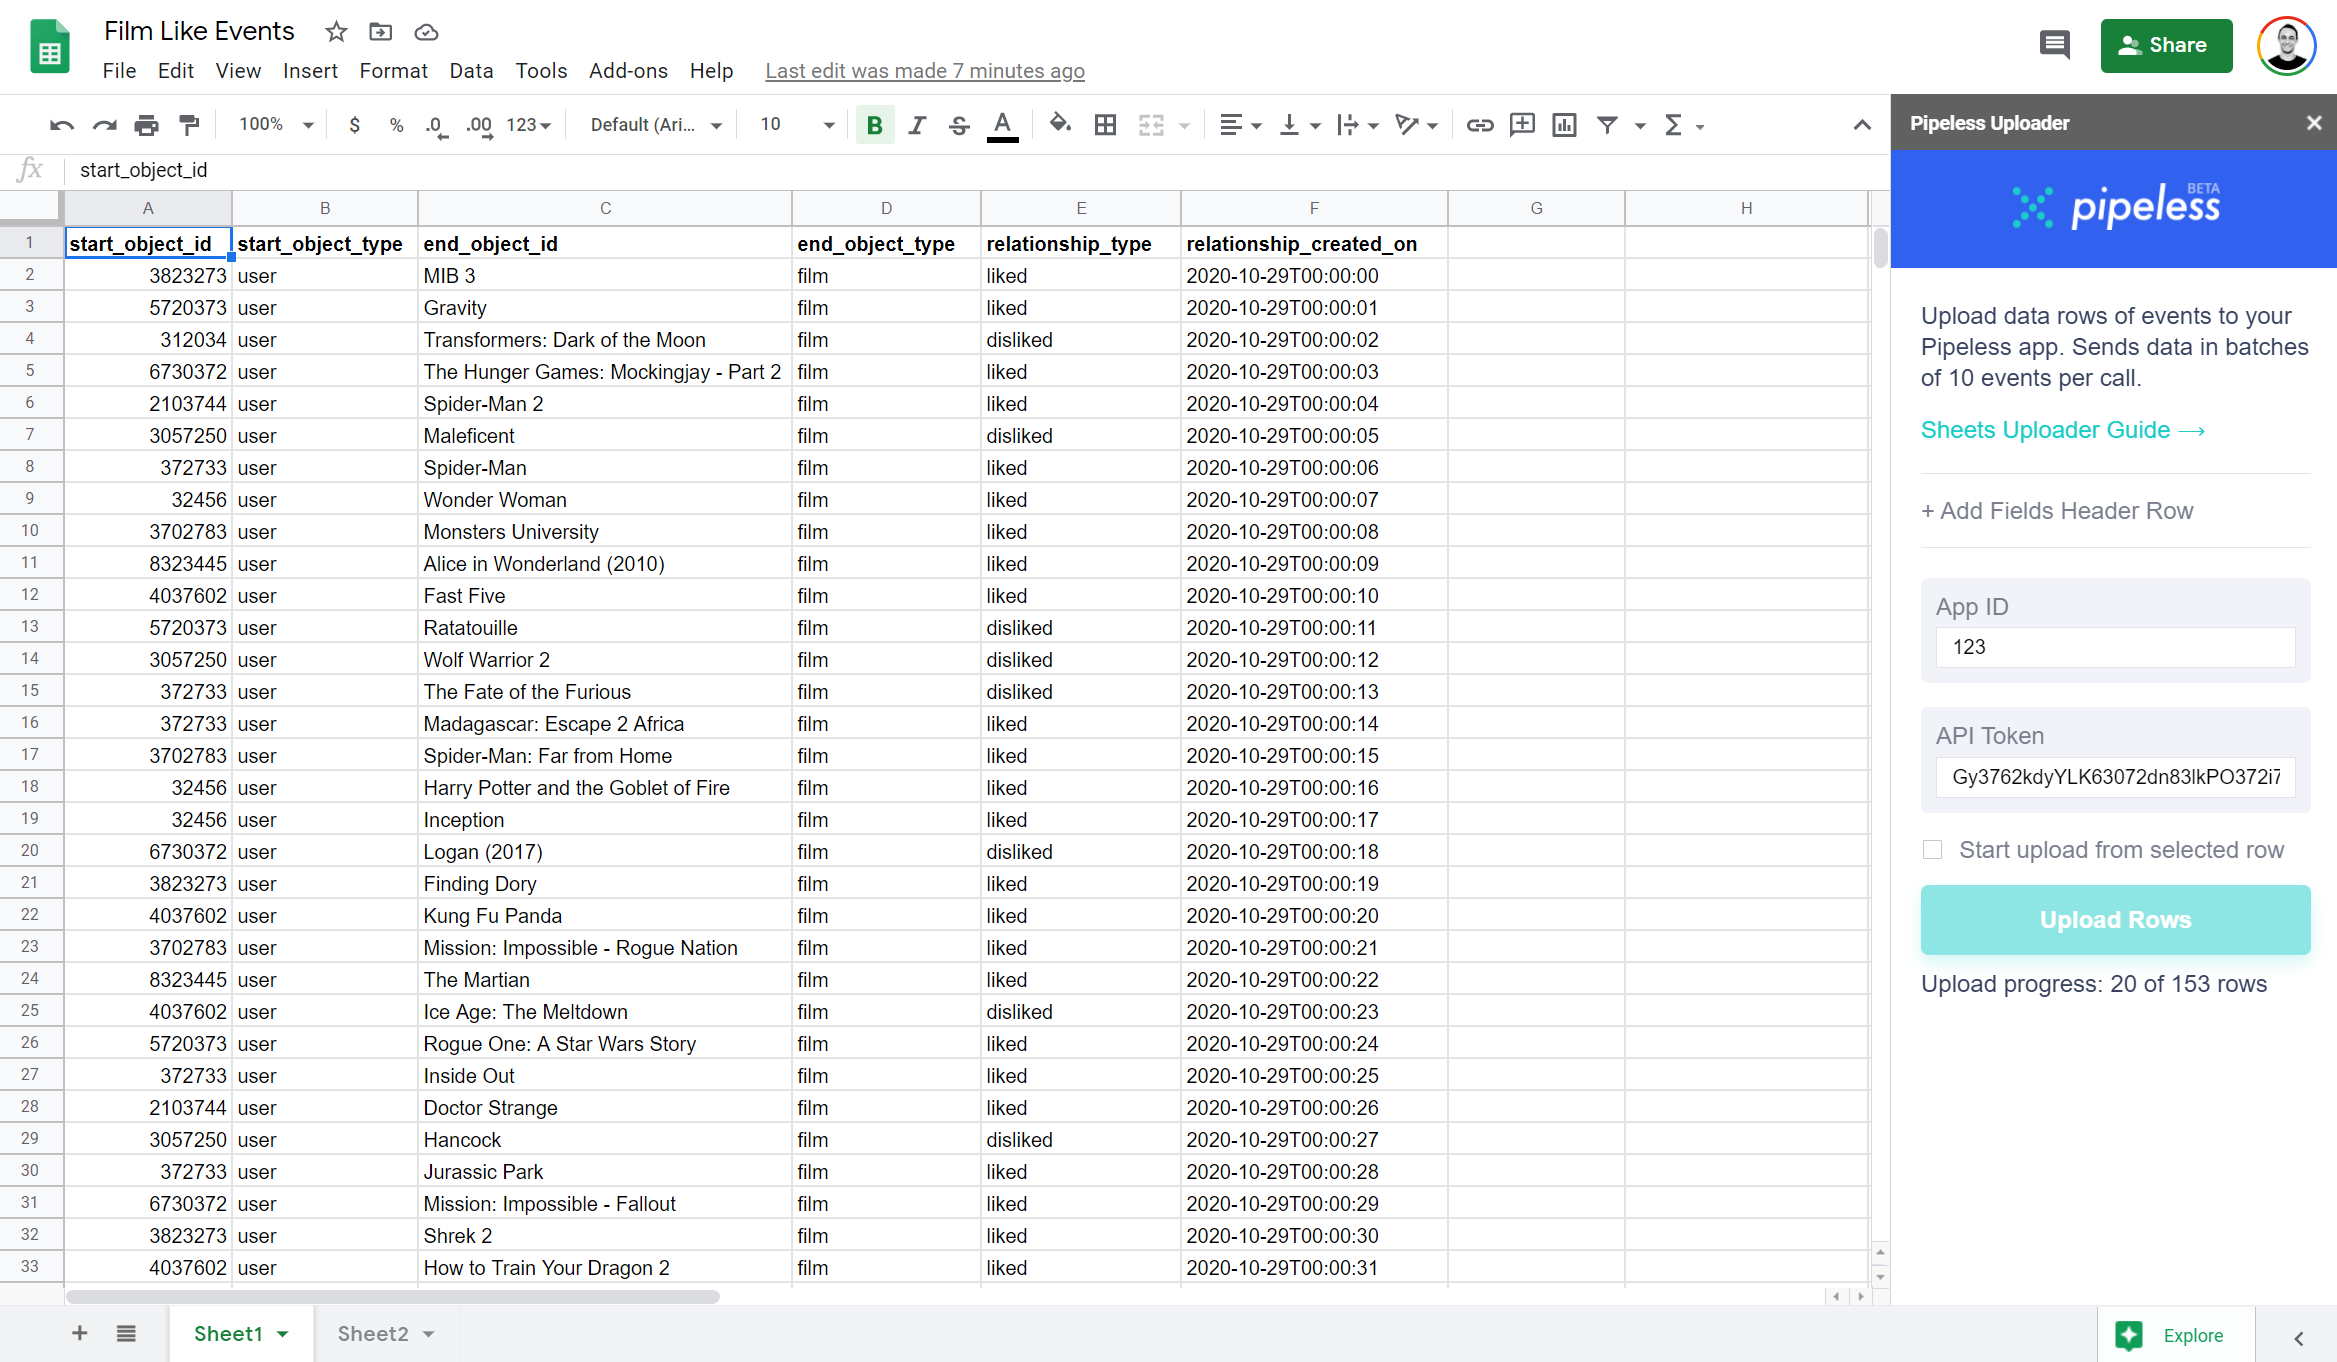
Uploader in uploading state, showing upload progress
Dealing with Errors
Your upload may be interrupted by an error. If you get an error that means your upload stopped at the last successfully competed batch, and the batch of 10 rows that included an error was not uploaded, so all events from that batch would need to be uploaded again, not just the one row with the error.
In the example screenshot below, 30 of 153 event rows had been uploaded, while the error occured on Row 34. This means the first 3 batches of 10 rows were successfully uploaded, but the last batch of 31-40 event rows errored out and none of those rows were uploaded.
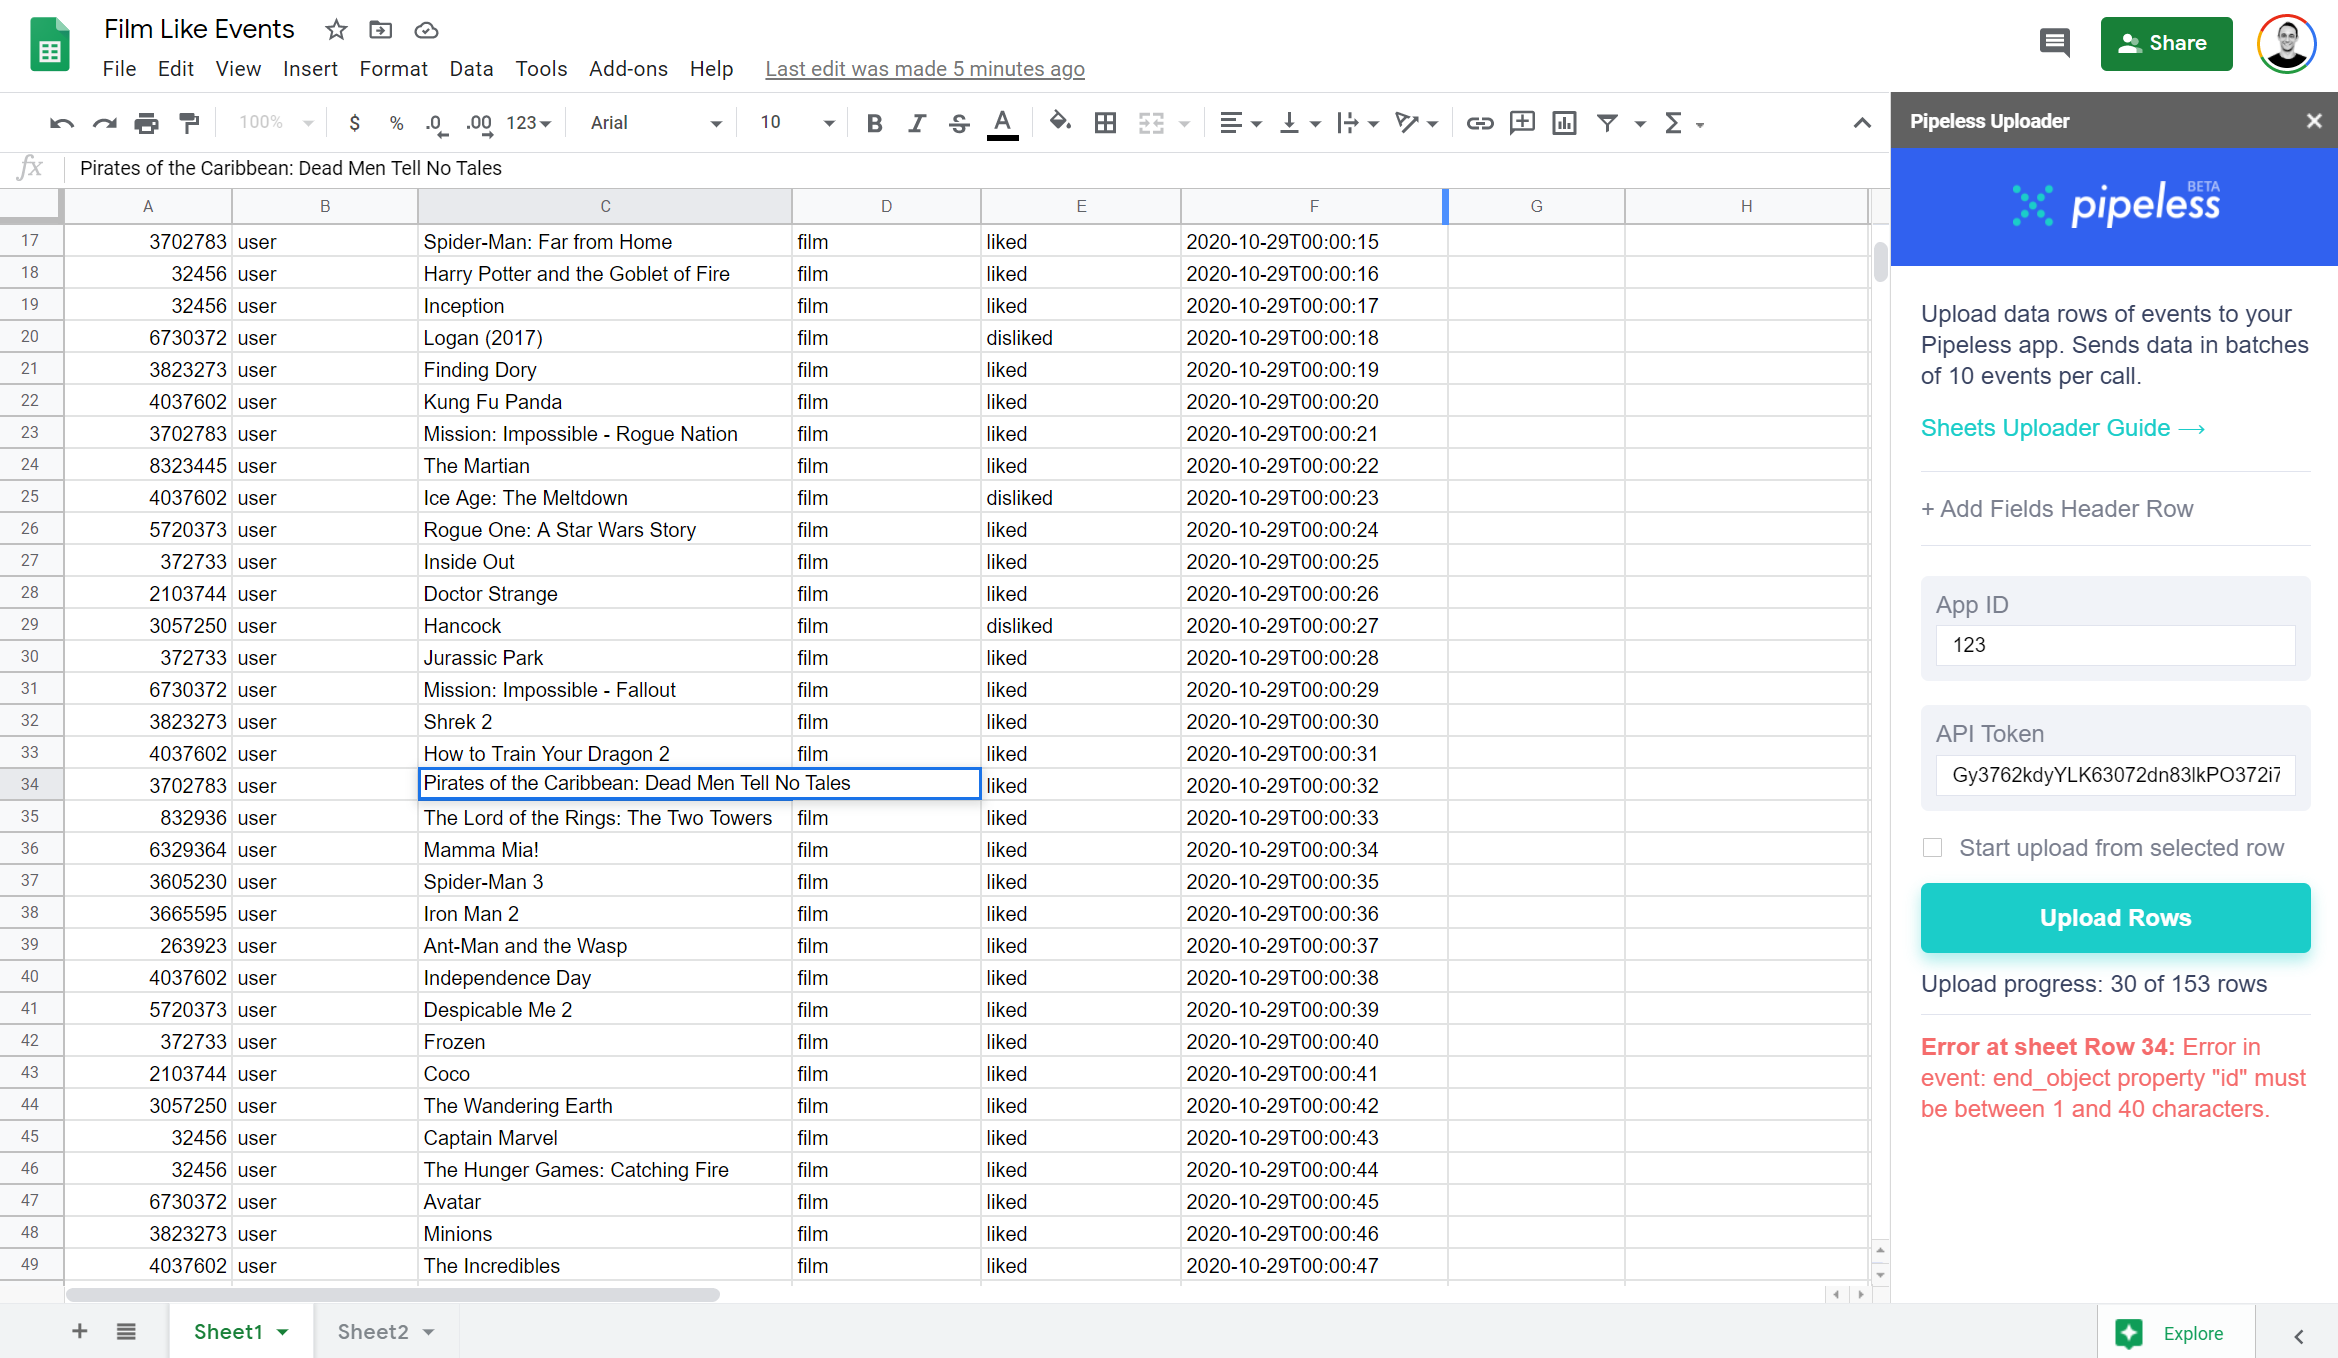
An error in uploading will stop the upload
Starting from Selected Row
Once you address an error, you can restart the upload from the beginning by clicking the button "Upload Rows" again (which will override all the previous data) or you can utilize the checkbox to "Start upload from selected row."
When you check "Start upload from the selected row" and then click the button "Upload Rows" the upload will now begin from that row and not from the beginning (which would be Row 2 since header is skipped). If an error occurred that you corrected, and you want to start from where the upload left off, you will want to make sure you select the row that started the last batch, and not only the row that had the error as an error in a batch will reject all events in that batch.
For the example error above, the upload progress says that 30 event rows were uploaded, so if you add in the header row as Row 1, that means, the last successfully uploaded row was Row 31, and the start of the failed batch was Row 32. If you select Row 32 and check "Start upload from selected row" you'll be able to start right from where you left off.
Once the upload finishes, you'll see the success message "Upload complete!" along with how many event rows were successfully uploaded from this latest upload round.
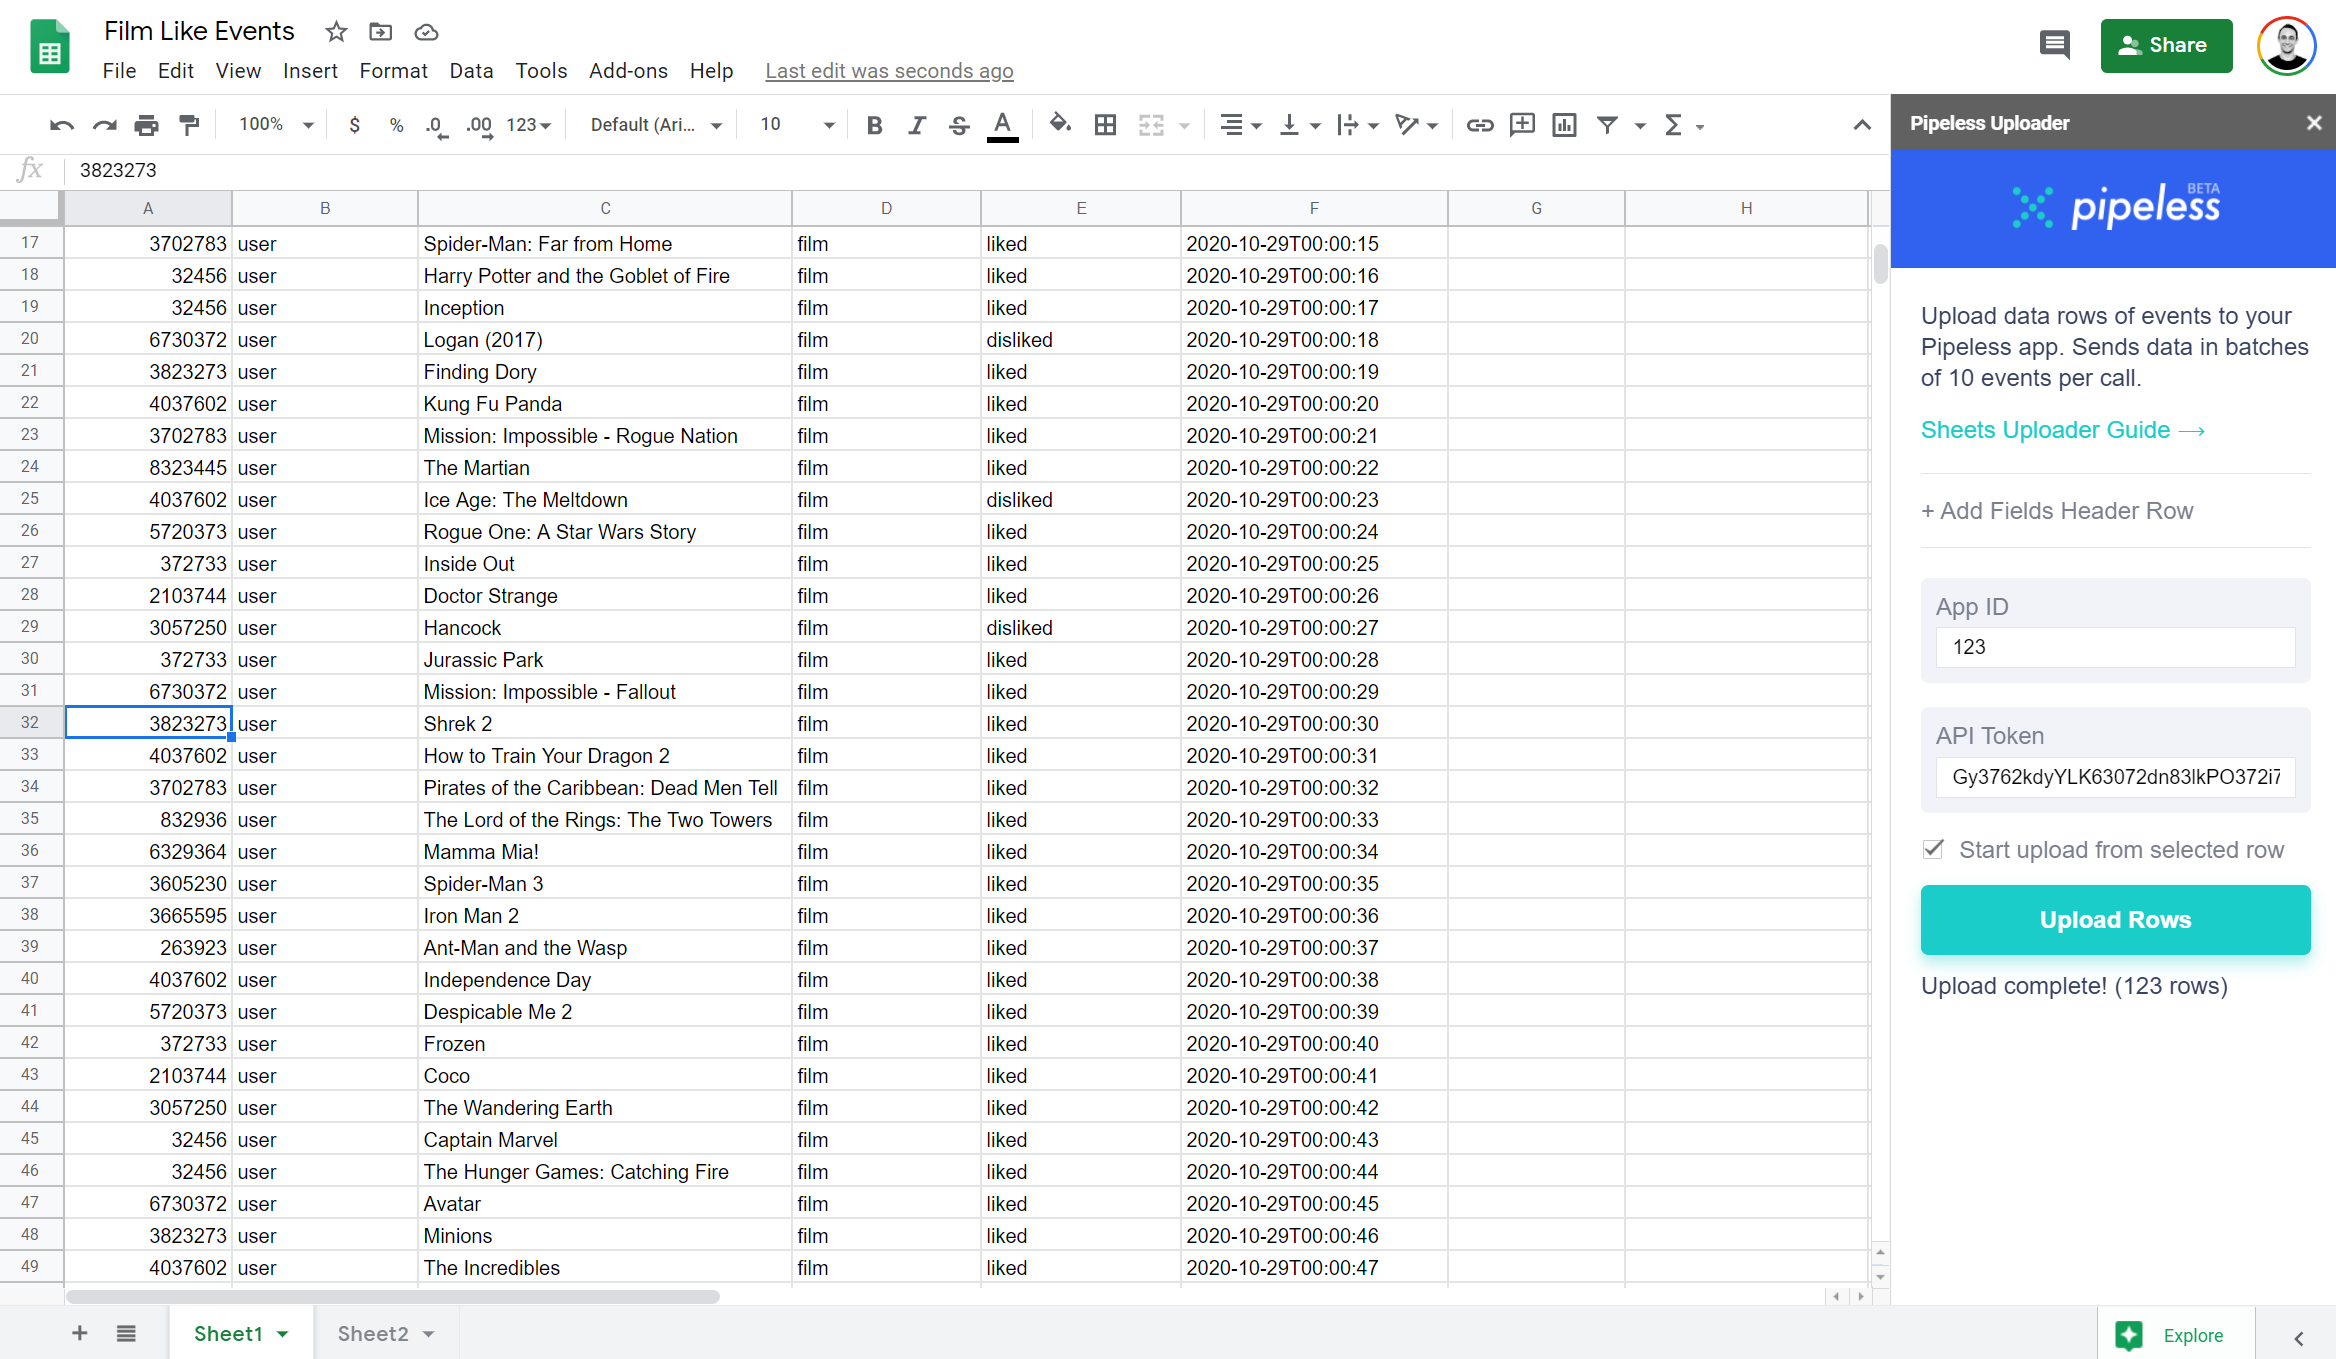
You can check the box to "Start upload from selected row" to continue from where the latest batch finished
Considerations
This Google Sheets Add-On is great for getting started with a small project that has some historical data you want to test out, but it's probably not something you want use for production or if you need real-time responsiveness. For that, check out our Uploading data docs or Create Events Batch reference docs or our client libraries.
Updated 9 months ago